Multimedia
BRUSHES
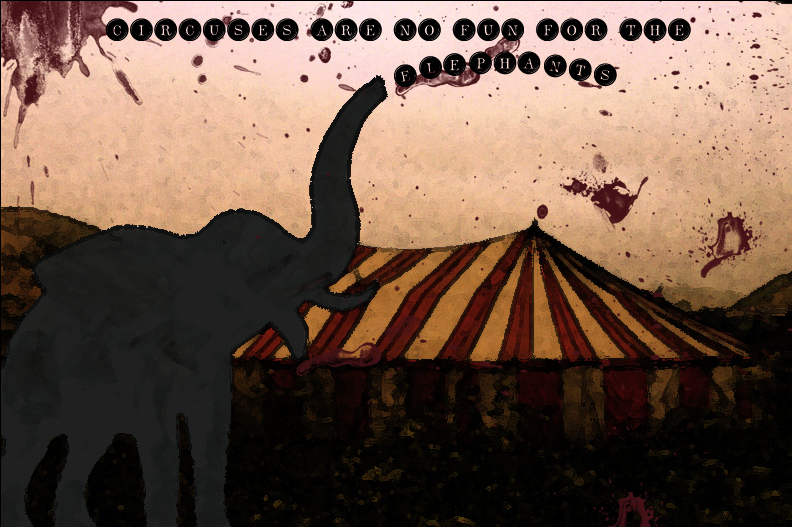
Description: For this project, we were told to pick an issue; politics, war, abuse, etc. to display in an image. To create the image we had to use brushes rather than just images. The goal was to display your issue in a way that would get a viewers attention and spread awareness for your cause, as well as being visually appealing.
Process: The first step for me was to pick a cause that I was passionate about. This was difficult because I'm not too involved in major world issues. Instead, I thought about what I really like and came up with, ELEPHANTS! I did some more research on elephants and found out that they are being abused all over the world in circus'. Next, I needed to search for different brushes, particularly circus brushes. I found an elephant brush that I liked from brusheezy.com. After uploading a background image of circus grounds, I used the brush to place an elephant on the front of the image. I didn't feel like the image was displaying much of a cause at that point, so I downloaded blood splatter brushes and placed them on another layer. To give it a grunge feel, I filtered it with an effect on photoshop. To top it off, I came up with a saying to really push my point, "Circuses are no fun for the elephants."
Reflection: I am really, really happy with how my project turned out. I like that I was able to work with elephants (my obsession), in a project. Once I began, everything started to happen so naturally, without me thinking and it turned out amazing in my opinion. If I was able to, I would change a few things. One is the way that I did my typography. I had a hard time making the word "elephants" on a curve and later learned that there was a tool for that very thing! So I would adjust that to make it more professional. Also, I would find a more realistic looking elephant, since my background is a realistic looking image, rather than a cartoon. I feel like I learned a lot of neat tricks, like brushes themselves and how easy they can make a project. I'm very pleased with my final draft.
How Will I Use These Skills In The Future?: I now know what brushes are, where to find them, and how to use them. They can be used on almost every single photoshop project that I do and so far they have been. It simplifies every project and saves time. I will continue to use them throughout my high school career and maybe even my work career.
DISC
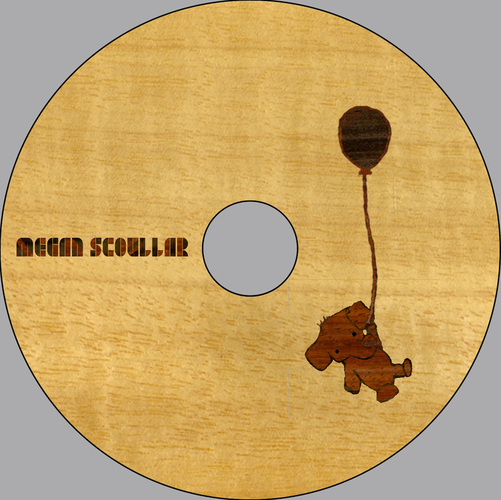
Description: This project was about creating a demo reel disc cover design that our work would later be put onto. The look had to be something that displays your style and the things that you like. Basically, we were branding ourselves. My disc design is the representation of my brand.
Process: The first step was to come up with a "brand" that you wouldn't mind putting onto all of your work. The first thing I thought of? Elephants! Another style I really like is the wood look. So I tried to think of ways to combine the two. Earlier in the year, I completed a typography tutorial that incorporated Wood Inlay. So I went through the tutorial again, but this time spelling out my name, Megan Scoullar. I chose three wood textures that I liked and them layered them on top of each other. By creating layer masks, I was able to select certain parts of my texts using the marquee tool and then delete them, making the wood layer beneath the deleted layer, show through. I used this same concept on my elephant drawing to keep the look consistent. The elephant drawing is actually a drawing that I did myself, and then scanned into photoshop. I'm pleased with my final product.
Reflection: I am very happy with my disc design. It has two thing that I really like, elephants and a wood texture. I didn't have much trouble completing the typography part of my disc as I already knew how to create a wood inlay effect. Drawing the elephant was also very easy as I am constantly doodling them. What gave me the most trouble was placing the wood inlay effect on the scanned doodle. I couldn't get a clean enough image of the elephant so I had to outline it with the tiniest eraser you could image, place it on three different layers of wood textures, go through the typography steps once again, and then place the final elephant onto the disc design with my typography already on it. It was very frustrating and time consuming, but I really like the way it turned out.
How Will I Use This In The Future?: I can use these new skills whenever I am working with photoshop. Also, if I ever decide to get into advertising, I'll know the basics of disc design! I also learned how to be patient. I had to work through my problems on my own, and that is a skill I can always use.